How to Add Products in eComwiser Seller App: Adding products in eComviser seller app is a simple and straightforward process, but there are a few things you need to know in order to do it correctly.
In this article, we will walk you through the steps involved in adding products on eComviser seller app.
We’ll also show you how to add product images, shipping information, product variations, and more! Let’s get started!
Step by Step Process to Add Products in eComviser Seller App
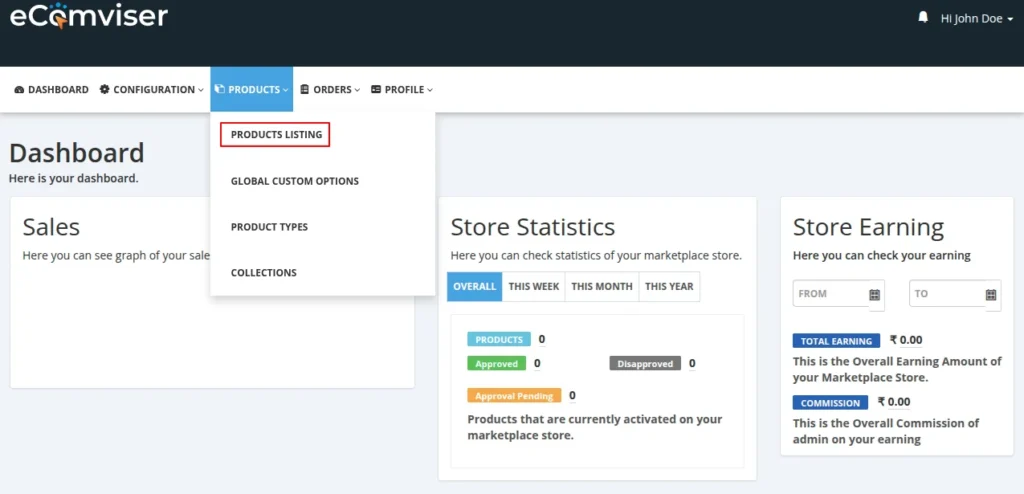
First, log in to your eComviser seller app and and go to Products -> Products Listing.
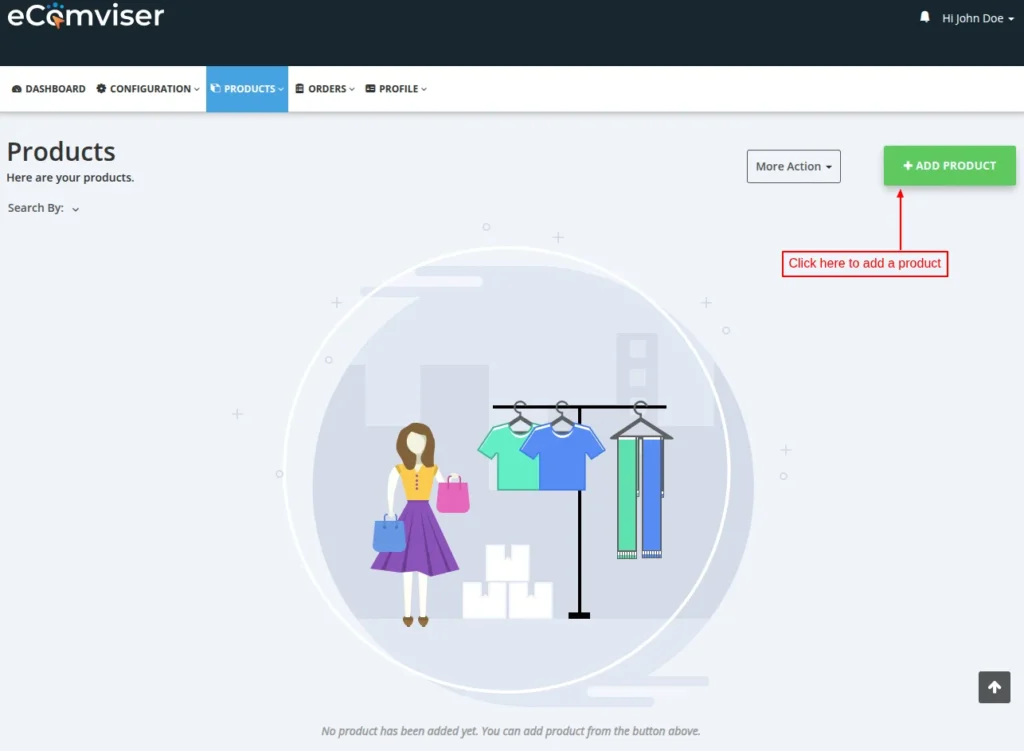
Now, click on ‘Add Product’ button on products page.
On clicking the button, a popup appears on the page where you have to select the product creation mode. There are two modes: manual and predefined.
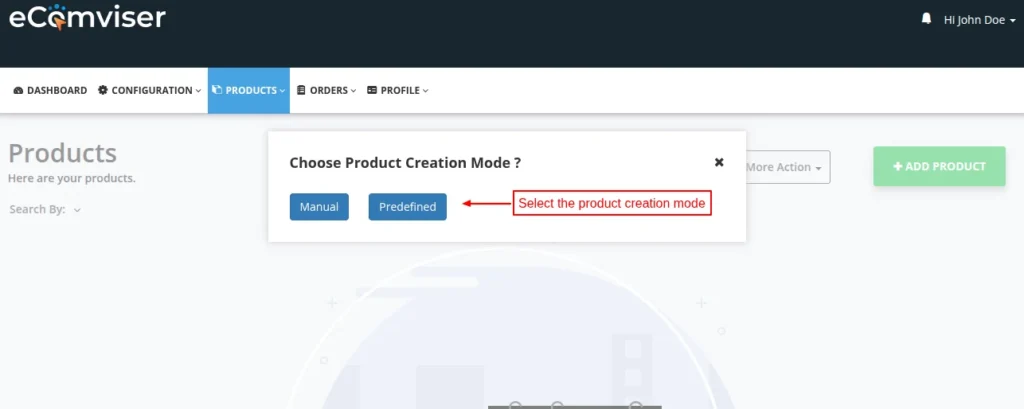
Click on manual mode to proceed.
Product Details
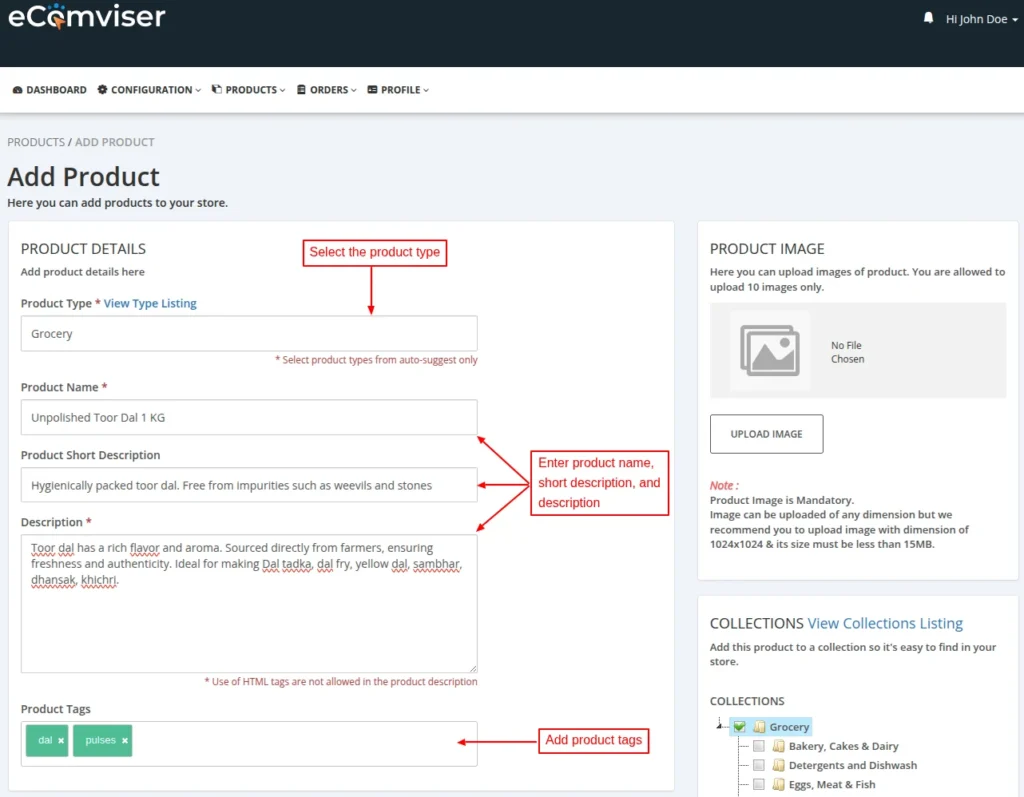
The following product details you can provide while adding a product.
- Product Type: Select the type of a product you would like to add.
- Product Name: Enter the name of the product that will be visible to the customer on the store.
- Product Short Description and Description: Specify the short description and description of a product.
- Product Tags: Add tags to the product that can help customers to search the products easily.
Product Image
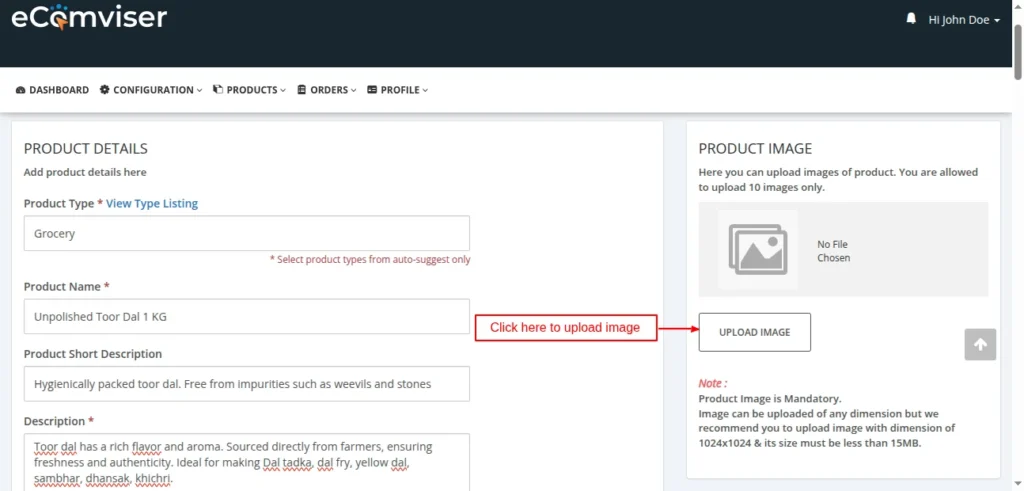
Images are a vital part of your product page as they convey product information more effectively. You can upload multiple images for a particular product by clicking on ‘upload image’ button.
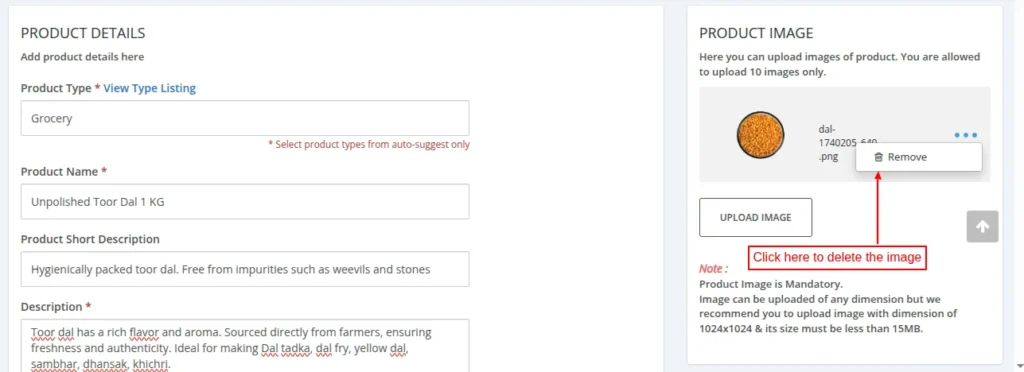
Once uploaded, you can delete it by clicking on ‘remove’ button.
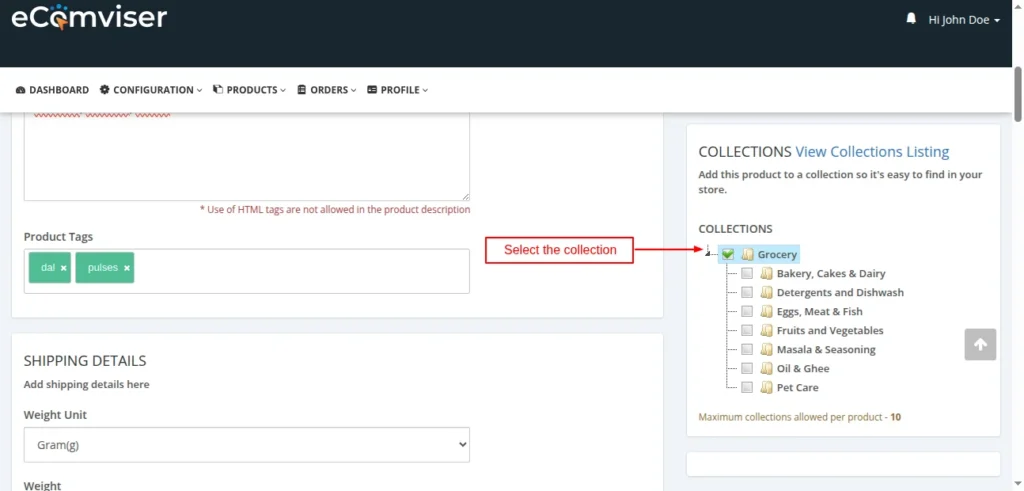
Select Collections
Adding products to collections will help customers find the products much faster on storefront. Customers can use collections on the front end to locate what they’re looking for.
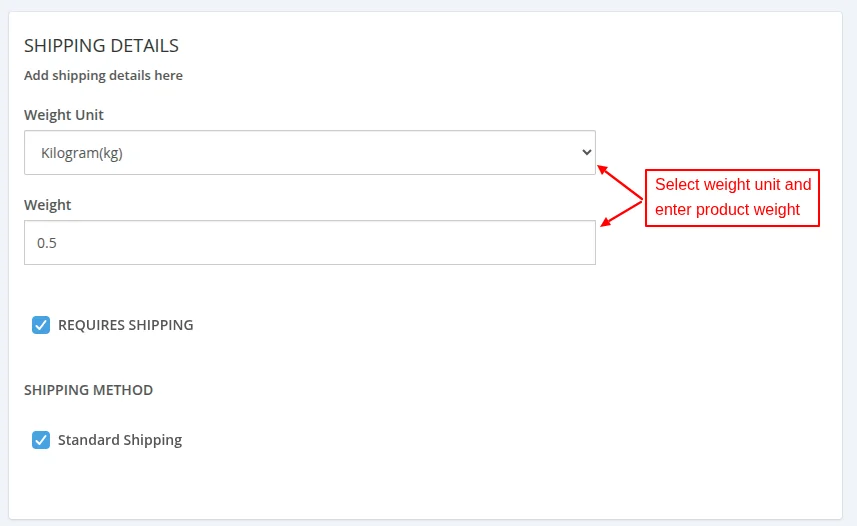
Add Shipping Details
In this section, you need to choose weight unit, specify product weight, and select the shipping method.
Add Pricing Details
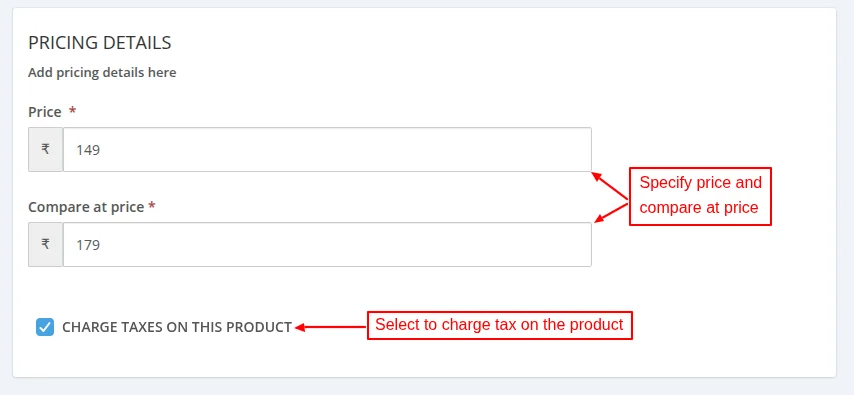
Following are the pricing details that you need to provide while adding a product.
- Price: Enter the selling price of a product at which you want to sell the product.
- Compare at price: This refers to the original product price and is displayed alongside the discounted sale price.
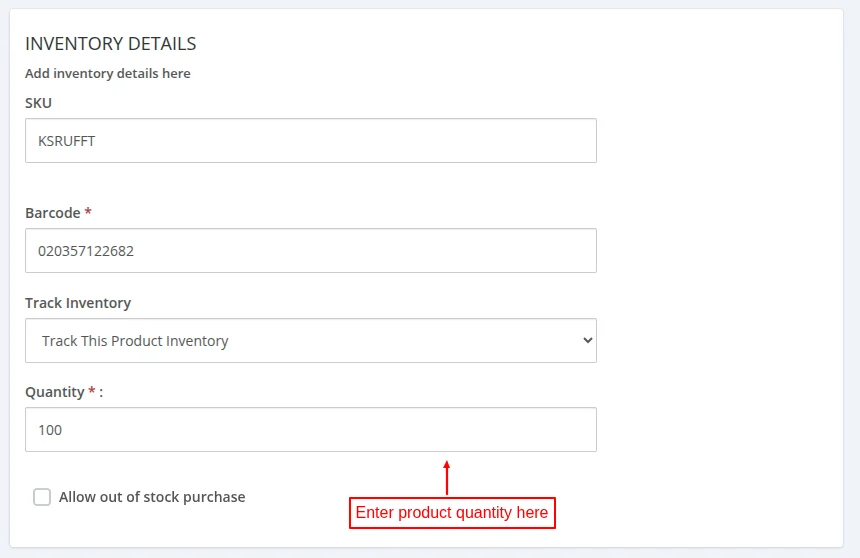
Inventory Details
Under this section, you need to mention unique identifiers that are used to identify the product.
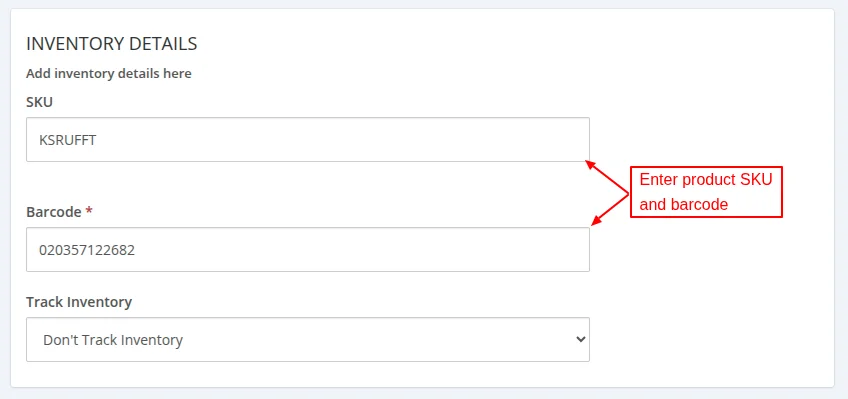
SKU: SKU or stock keeping unit is a code that is used to track inventory.
Barcode: A machine readable code in the form of numbers and pattern of parallel lines of varying widths used to track inventory, pricing, and other data.
Quantity: Enter product quantity.
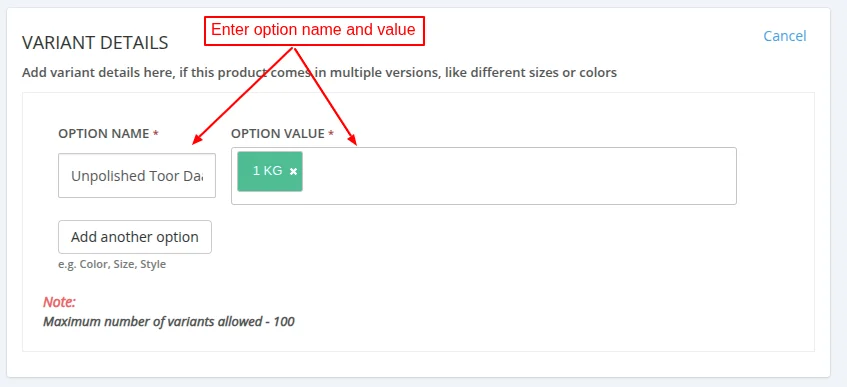
Variant Details
You can add variations of a product under variant details tab. Click on ‘Add variant’ option.
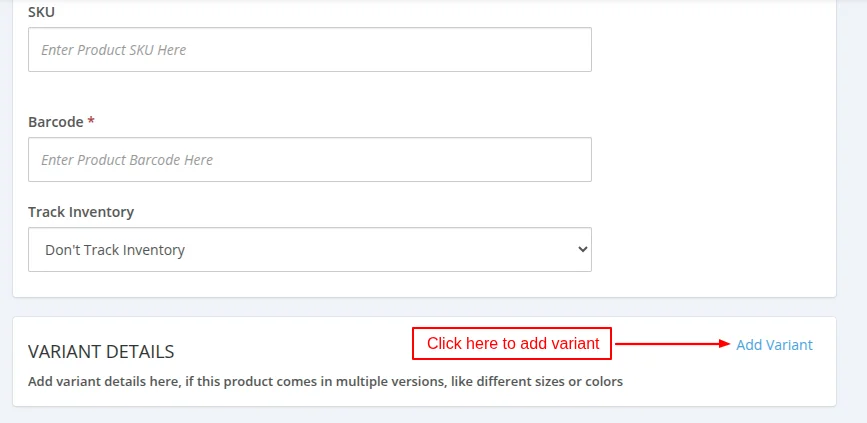
Enter option name and value in the respective fields.
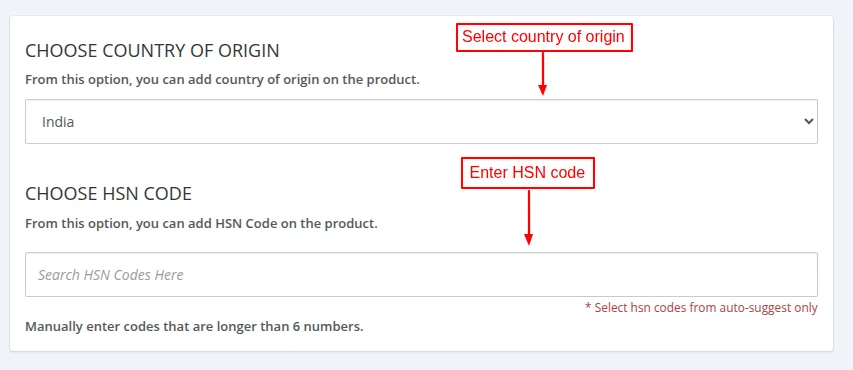
Choose Country of Origin and HSN Code
Country of origin
This fields enables you to select country of origin of the product.
HSN Code
HSN or Harmonized System of Nomenclature code is used to classify goods for taxation and trade. Developed by World Customs Organization (WCO), it serves as the global standard categorising products.
Statutory Requirement for Prepackaged Food
Primarily governed by the Food Safety and Standards (Packaging and Labelling) Regulations, 2011, the statutory requirement for prepackaged food mandates that all the food products sold in India that are prepackaged must adhere to specific labeling and display requirements.
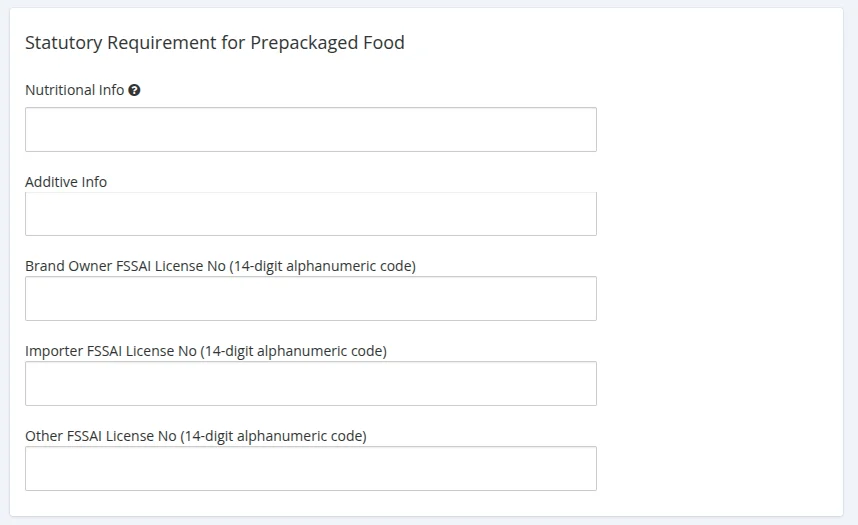
Under this section, you need to specify:
- Nutritional Info
- Additive Info
- Brand Owner/Importer/Other FSSAI License No
Return & Cancellation Policy
You must define return and cancellation policy while adding a product.
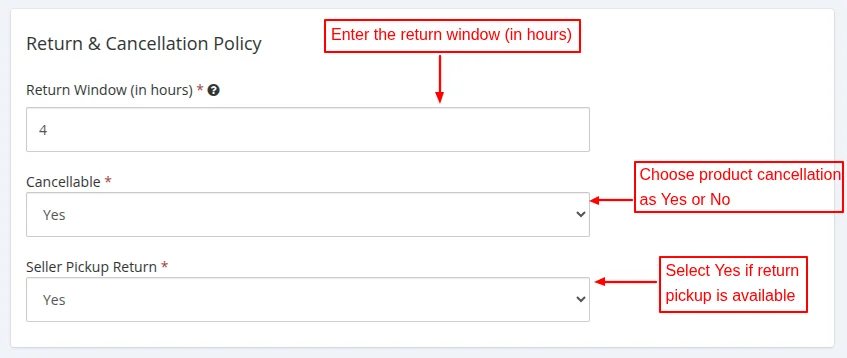
- Return Window: Here you need to specify the time till which the customer can return the product. For example. you have set 4 hours in the return window. If the order was delivered at 12 pm, the customer can request for a product till 4 pm.
- Cancellable: Here, you need to define if the product is cancellable or not. If selected yes, then customers can request cancellation after placing an order.
- Seller Pickup Return: Select Yes if return pickup is available for the product.
Statutory Requirement for Packaged Commodities
As defined by the Legal Metrology Act, 2009 and the Legal Metrology (Packaged Commodities) Rules, 2011, the statutory requirement for packaged commodities set guidelines for packaging materials, labeling, and dimensions.
The aim of these rules are to ensure fair trade practices and protect consumers’ interests by providing accurate and transparent information about the products they purchase.

Under this section, you need to specify:
- Manufacturer/Packer Name
- Manufacturer/Packer Address
- Generic name of commodity
- Manufacturing Date
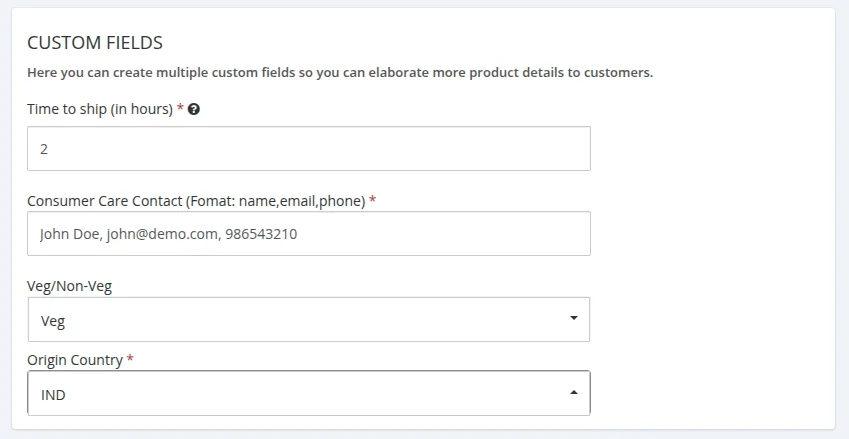
Custom Fields
Provide additional product information to customers by adding custom fields to product. Add extra details to products like shipping time, consumer care contact details, country of origin, and nature of food (veg or non veg).
Once you have added all the details and saved them, you can view the product under ‘Products’.
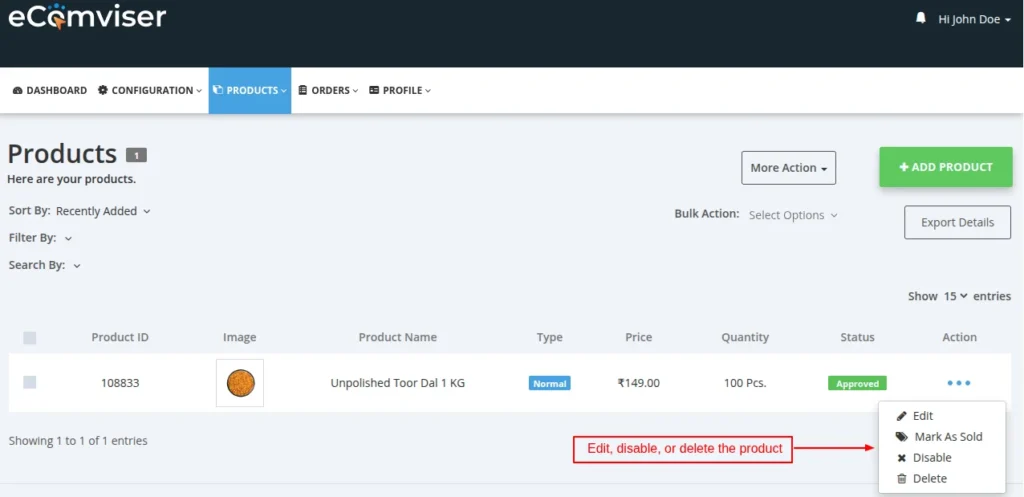
Once added, you can edit, delete, disable, or mark the product as sold.
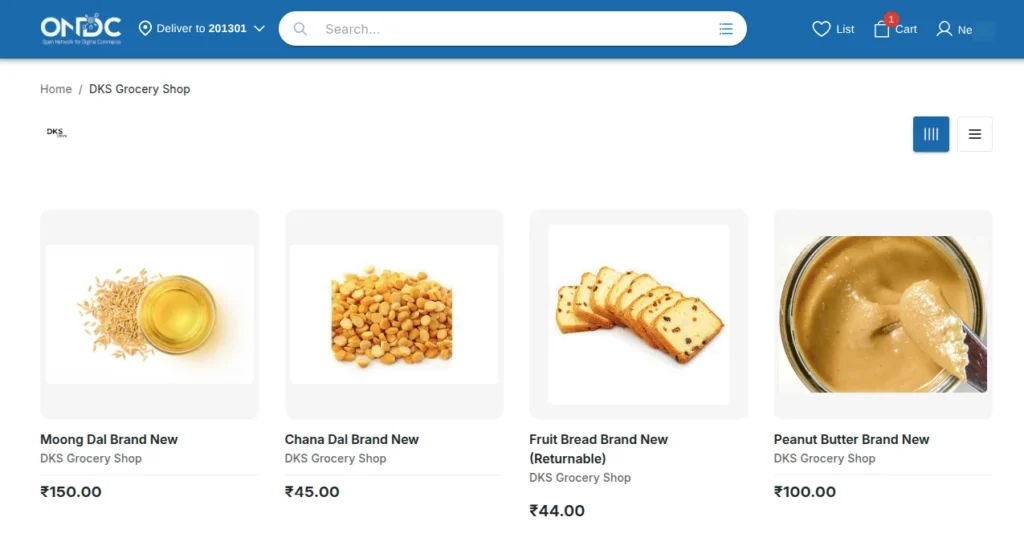
Front View
Once added, the products will display on the ONDC buyer app as shown below.
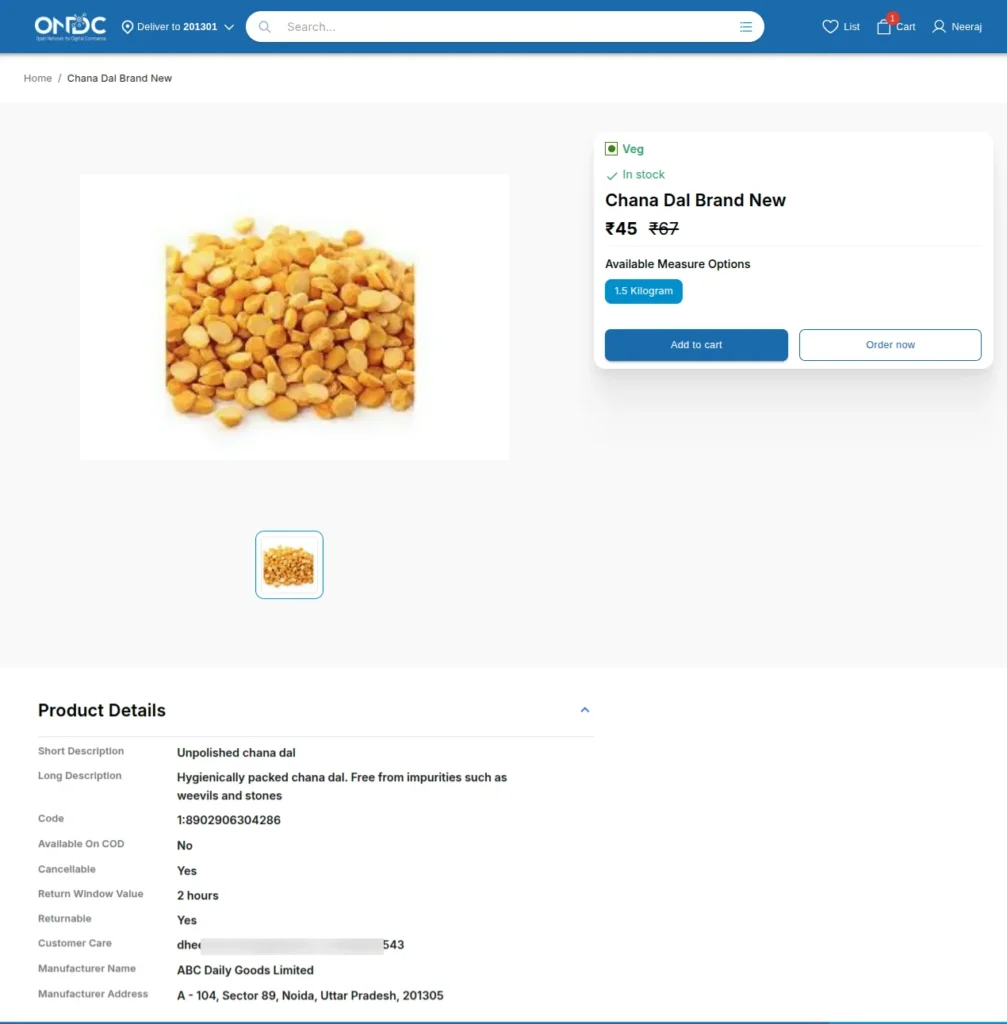
Product Page
This was all about process of adding products in eComviser Seller App.
Support
For any kind of technical assistance or query, please raise a ticket at http://webkul.uvdesk.com or send us a mail at [email protected]

Be the first to comment.