ONDC Buyer App Package Installation Guide: Installing the ONDC buyer app package can be a complex task for some users.
In this article, we will walk you through the step-by-step process involved in installing the ONDC Buyer app package on bagisto.
By installing the buyer app package, you can make your bagisto store a part of ONDC network, opening up new opportunities for business growth and better customer reach.
ONDC Buyer App:
ONDC buyer app is an application/website that enables customers to access and interact with the Open Network for Digital Commerce (ONDC).
It allows buyers to compare prices, place orders, make payments, and track deliveries of the products/services from multiple sellers on a single platform.
ONDC Seller App:
ONDC seller app is an application that enables sellers to access and list their products on Open Network for Digital Commerce (ONDC).
It allows sellers to track all the the order activities, including order confirmations, cancellations, returns, payments, and delivery status ensuring full visibility and control over their sales process.
How Buyer App and Seller App Works:
ONDC is a network that connects multiple buyer apps with multiple seller apps such that if a product is listed on any one of the seller apps, it will be listed on all the buyer apps.
How they work together:
- A buyer searches for a product on the Buyer App.
- The ONDC gateway fetches matching listings from multiple Seller Apps.
- The buyer places an order and pays through the Buyer App.
- The Seller App receives the order, processes it, and ships the product.
- Updates like order status and delivery tracking are shared between both apps via the ONDC protocol.
Prerequisites for ONDC Buyer App:
Minimum system requirements that are required before installing the ONDC Buyer App on Bagisto:
- Redis: Installed and running (for caching and session management)
- Bagisto: Version 2.1.2 installed and functional.
How to Install ONDC Buyer App Package:
Step 1: Add Ondc folder extracted from given package zip
- Navigate to your Bagisto installation’s packages/Webkul directory.
- Copy the ONDC folder from the provided package zip into this directory
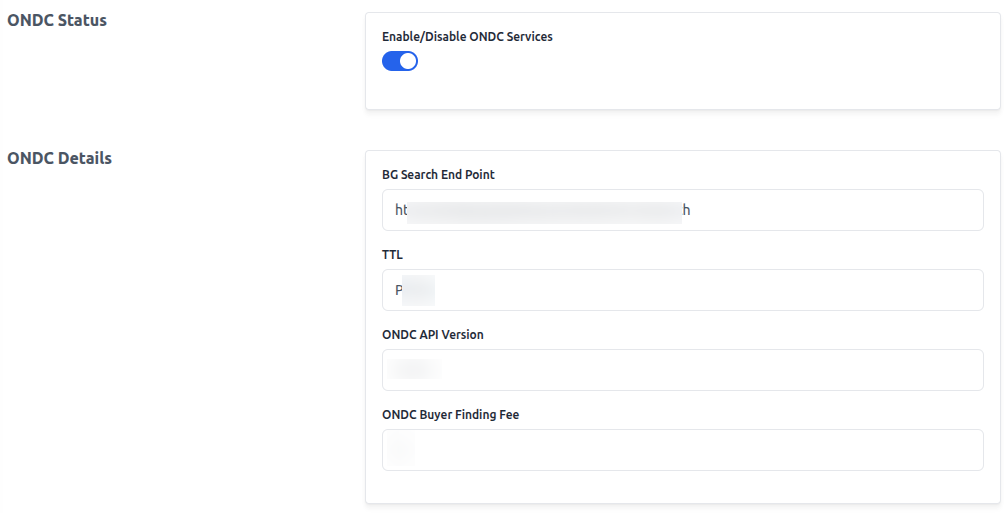
Step 2: Configure ONDC API Keys and Settings
First, the admin will have to enable the Bagisto Store for ONDC services.
Then, Under ONDC details, the admin has to specify:
- BG Search End Point
- TTL
- ONDC API Version
- ONDC Buyer Finding Fee
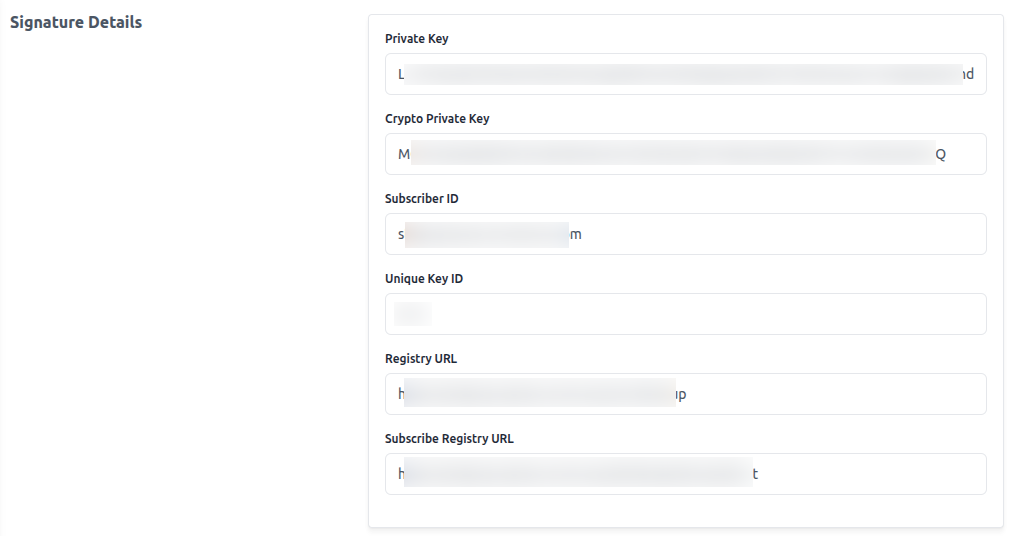
Signature Details
Under signature details tab, the admin has to specify:
- Private Key
- Crypto Private Key
- Subscriber ID
- Unique Key ID
- Registry URL
- Subscribe Registry URL
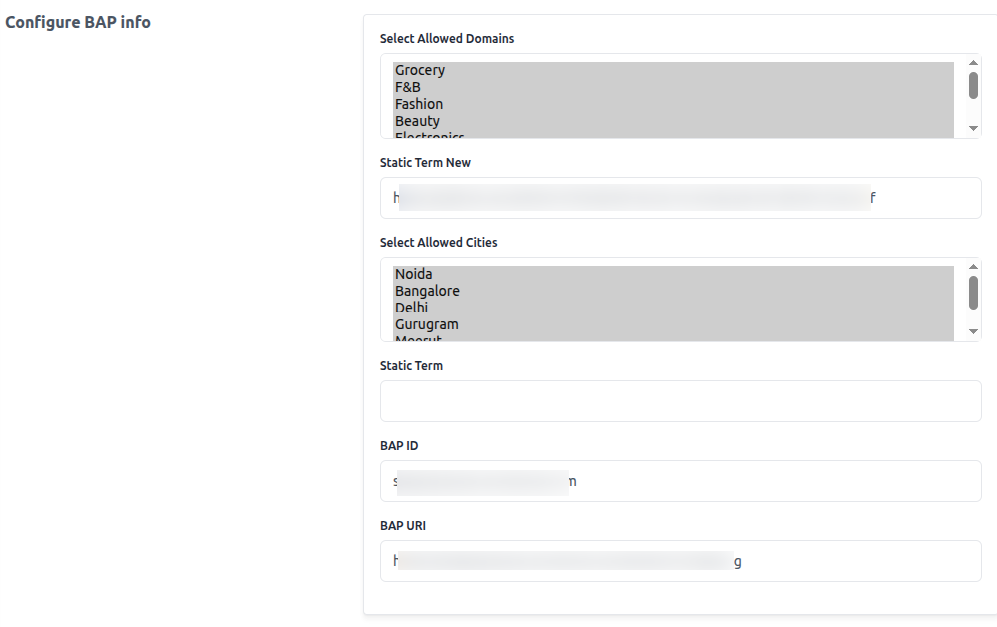
Configure BAP Info
Under this tab, the admin has to specify:
- Select Allowed Domains
- Static Term New
- Select Allowed Cities
- Static Term
- BAP ID
- BAP URL
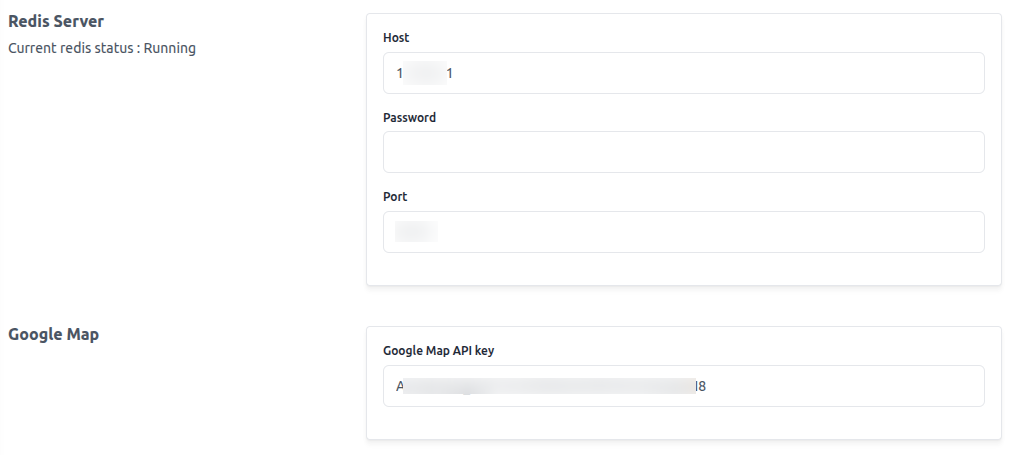
Redis Server
Under the Redis Server tab, the admin has to specify:
- Host
- Password
- Port
Google Map
Under this tab, the admin has to specify Google Map API key.
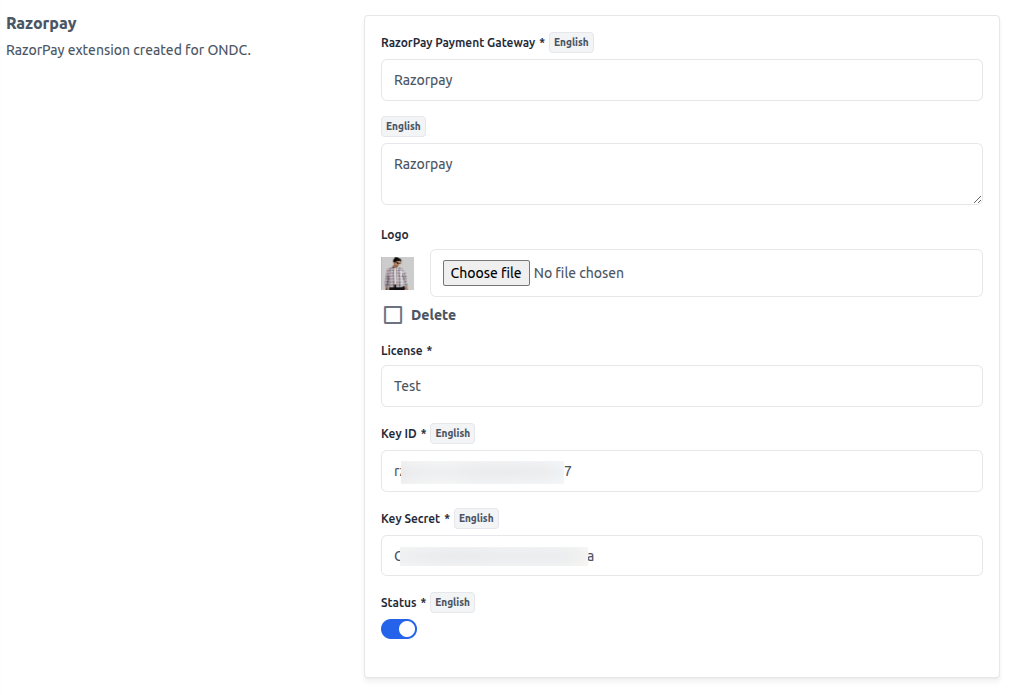
Razorpay
Under the Razorpay tab, the admin has to specify:
- RazorPay Payment Gateway
- Description
- Logo
- License
- Key ID
- Key Secret
- Status
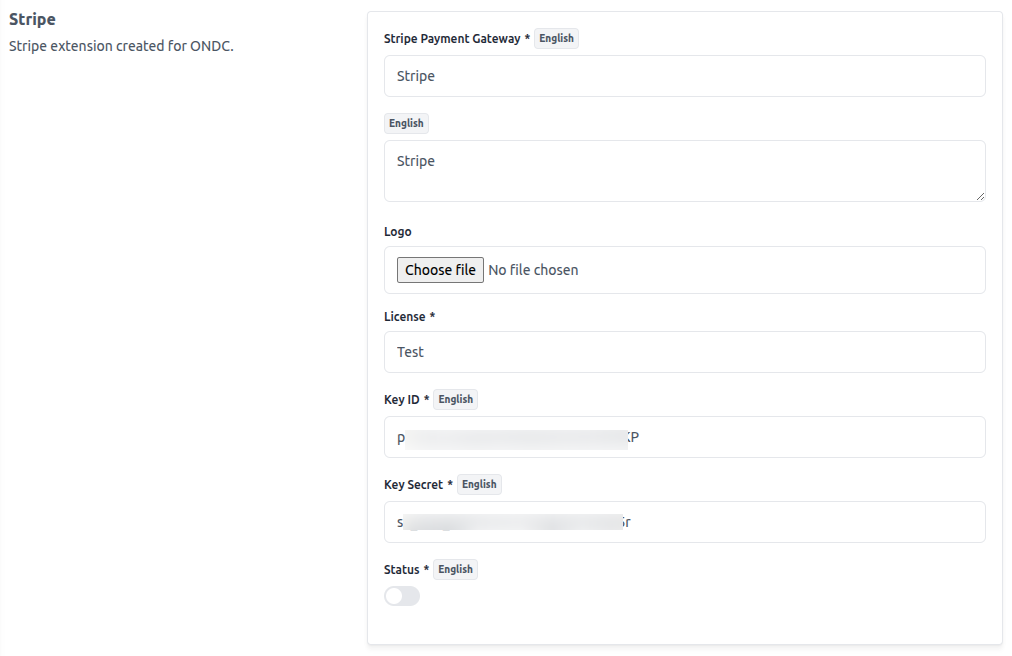
Stripe
Under this tab, the admin has to specify:
- Stripe Payment Gateway
- Description
- Logo
- License
- Key ID
- Key Secret
- Status
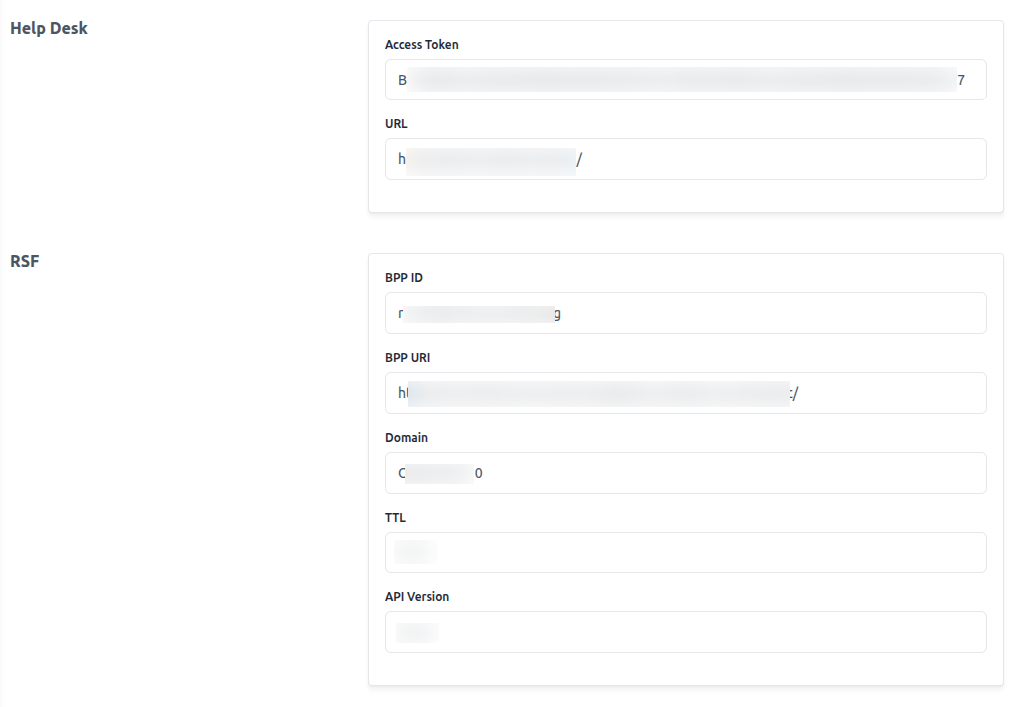
Help Desk
Under the Help Desk tab, the admin has to specify:
- Access Token
- URL
RSF
Under this tab, the admin has to specify:
- BPP ID
- BPP URL
- Domain
- TTL
- API Version
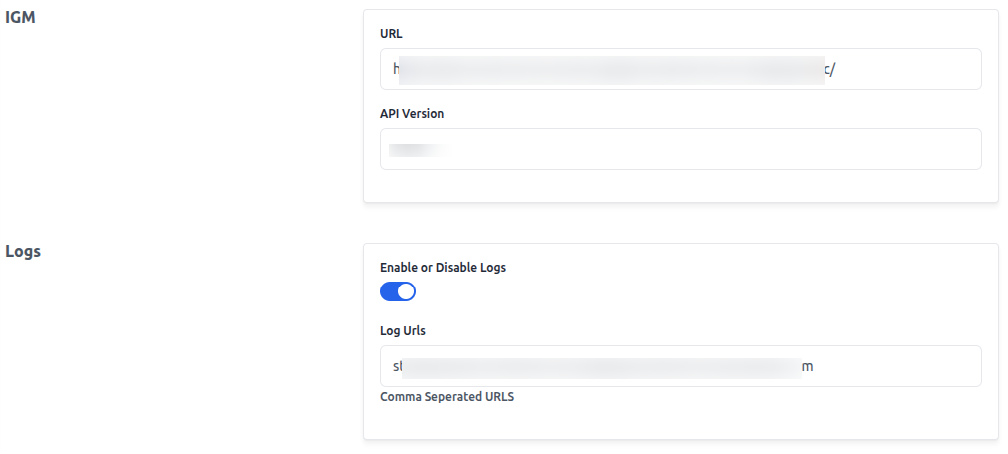
IGM
Under the IGM tab, the admin has to specify:
- URL
- API Version
Logs
Under this tab, the admin has to specify:
- Enable or Disable Logs
- Log Urls
Note : Always keep your keys and secrets secure. Never commit them to public repositories.
Step 3: Register the Service Provider
- Open config/app.php and add the ONDC service provider to the file.
- Add the following line to the providers array:
Webkul\Ondc\Providers\OndcServiceProvider::class,
Step 4: Update composer.json
- Open the root composer.json file.
- Add the following line to the autoload section under psr-4:
"Webkul\\Ondc\\": "packages/Webkul/Ondc/src"
Step 5: Run Composer Dump-Autoload
Execute the following command in your terminal:
composer dump-autoload
Step 6: Optimize the Application
Run the following command to optimize your application:
php artisan optimize
Step 7: Publish Vendor Assets
Finally, publish the vendor assets by running:
php artisan vendor:publish --force
When prompted, select the Ondc provider and press Enter.
Step 8: Apply Code Modifications
- Comment out the reindexBatch function in:
/packages/Webkul/Product/src/Helpers/Indexers/Inventory.php.
- In packages/Webkul/Sales/src/Repositories/OrderRepository.php, comment out the line:
$this->orderItemRepository->manageInventory($orderItem);
These changes help avoid conflicts with bagisto’s inventory management.
Step 9: Run Database Migrations
Apply the new database schema:
php artisan migrate
Step 10: Install Required Libraries
Install payment and support libraries:
composer require stripe/stripe-php:13.0
composer require laravel/cashier
composer require razorpay/razorpay:2.*
composer dump-autoload
Step 11: Set Up Catalog Refresh
- CRON Job: Set up a daily job to refresh the ONDC catalog:
https://{{ base_url }}/ondc/refresh
- Supervisor (Optional): For queue management, use Supervisor with:
command=php /home/bagisto/bagisto/artisan queue:work --queue=priority,default database --sleep=3 --tries=3 --max-time=3600
- Logs: View or clear logs at:
https://{{ base_url }}/ondc/logs
Step 12: Redis Configuration
Update your .env file with the correct Redis port:
- 6379, 6380 (default master, slave port) according to your redis configuration
Step 13: Few miscellaneous points
- Ensure images load correctly by running:
php artisan storage:link
- Run Setup Commands:
composer update
composer dump-autoload
php artisan vendor:publish --force
php artisan optimize:clear
php artisan cache:clear
- Verify Redis and Restart Supervisor
Kindly refer the following tips for a Smooth Installation:
- Backup your project before making major changes.
- Test in staging before going live.
- Keep documentation of all configuration changes for future troubleshooting.
- Regularly update your installation guide as dependencies and requirements evolve.
Conclusion
By following the above steps, you will achieve a fully integrated ONDC Buyer App with your Bagisto store, supporting advanced e-commerce and payment features.
Support
For any kind of technical assistance or query, please raise a ticket at https://webkul.uvdesk.com or send us a mail at [email protected]

Be the first to comment.