The eComviser Seller App enables businesses to seamlessly onboard to the ONDC network, list products, manage orders, and track payments from a centralized dashboard.
By completing the onboarding process, sellers can expand their reach across multiple ONDC buyer applications and access a wider customer base throughout India.
Seller Registration
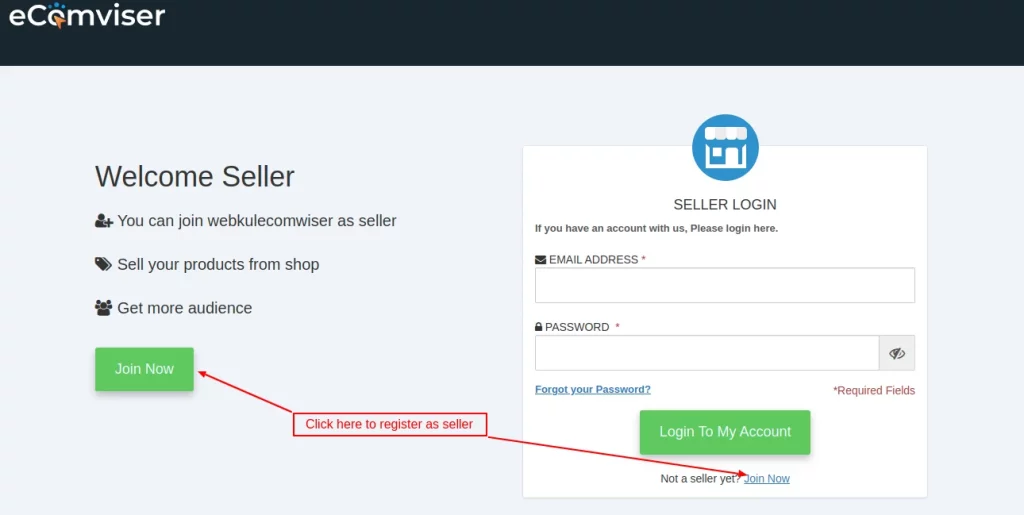
To get started, visit the eComviser Seller Portal and create your account.
- Navigate to the seller registration page.
- Click Join Now.
- Enter the required business and contact details.
- Submit the registration form to create your seller account.
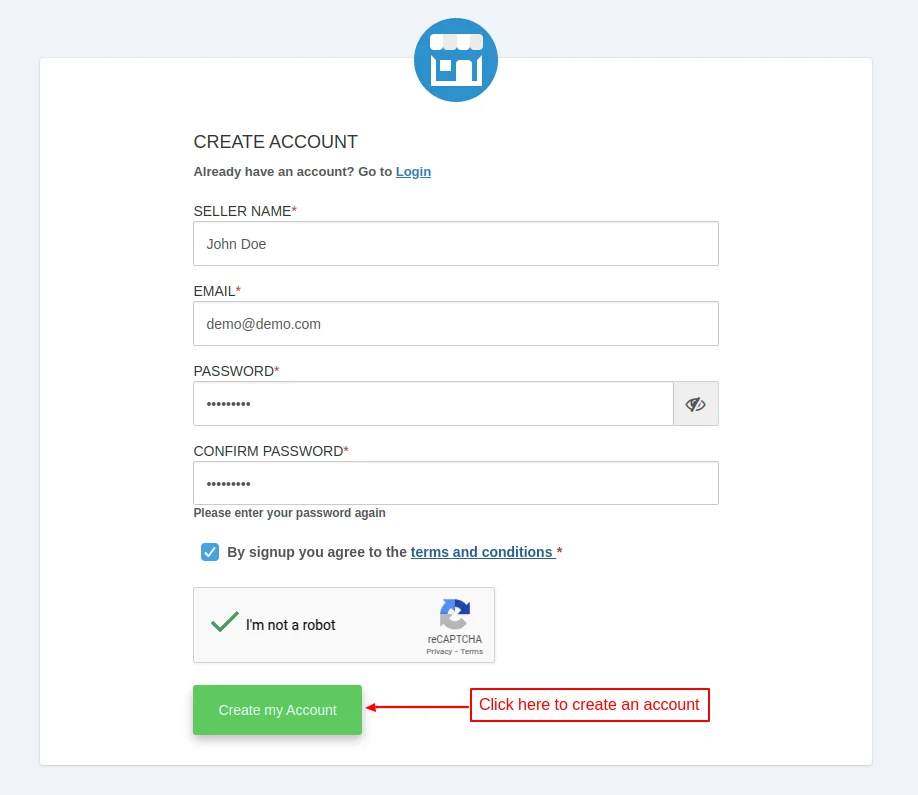
Once your account has been successfully created, proceed with the seller onboarding process.
Seller Onboarding Process
The onboarding process consists of several steps designed to verify your business information and configure your store for selling on the ONDC network.
Step 1: Select Product Category
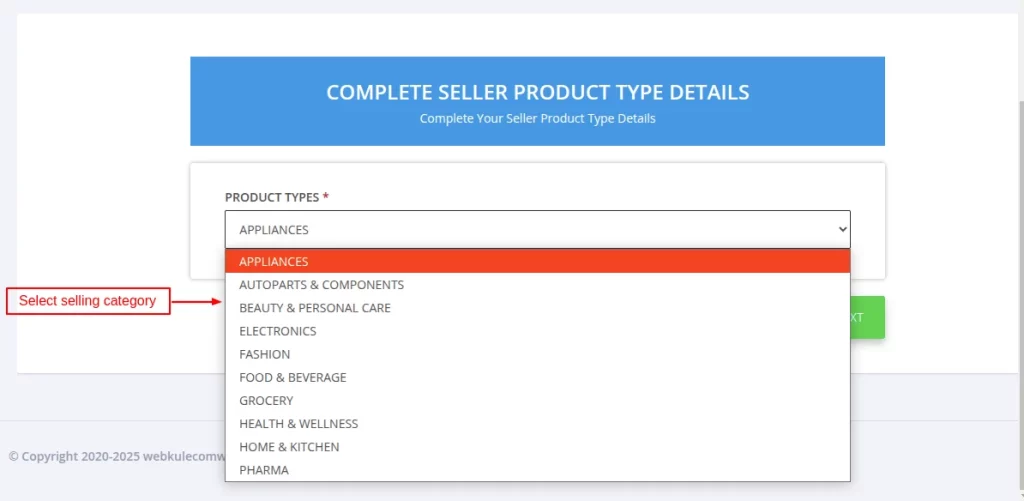
Begin by selecting the primary product category that best represents the products you intend to sell.
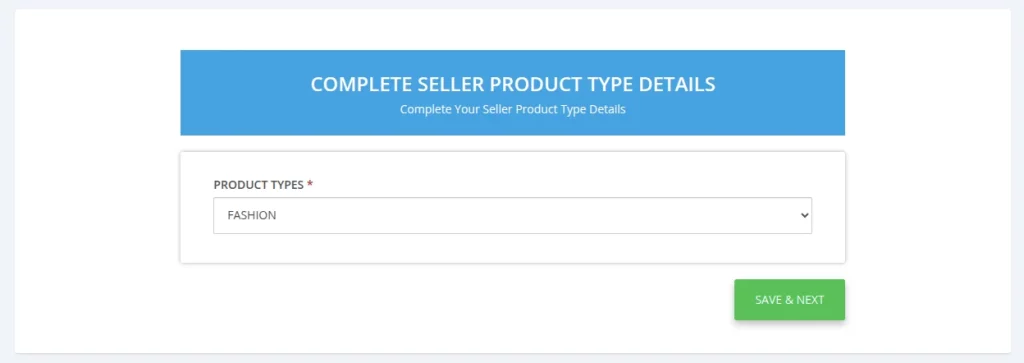
- Click Save & Next to continue.
- Choose the appropriate category from the dropdown menu.
- Review your selection carefully.
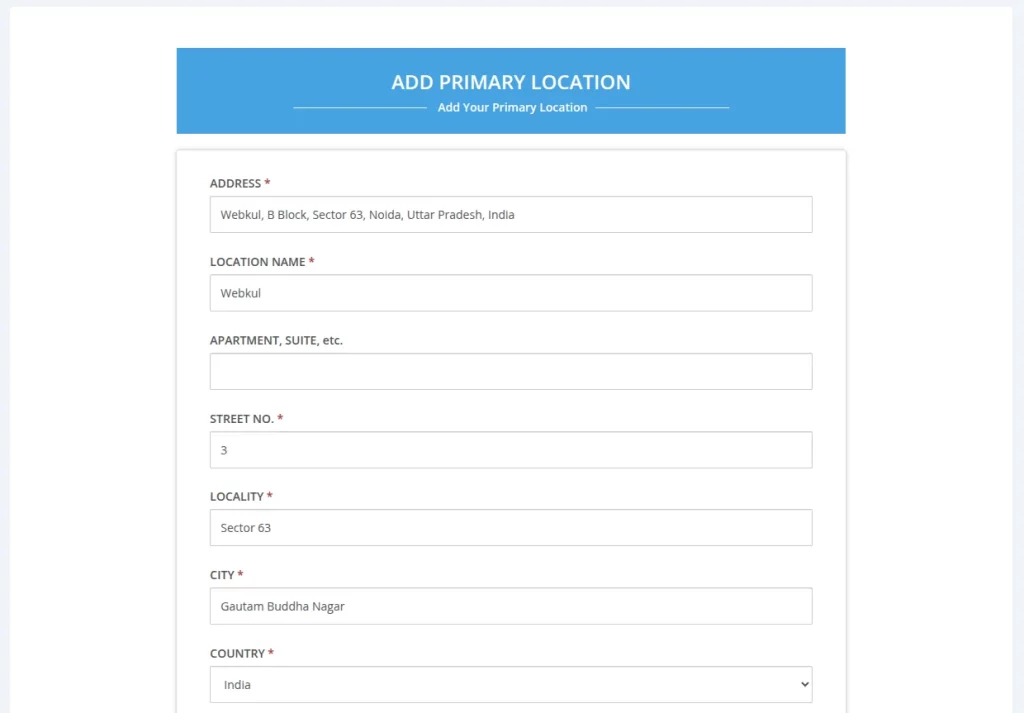
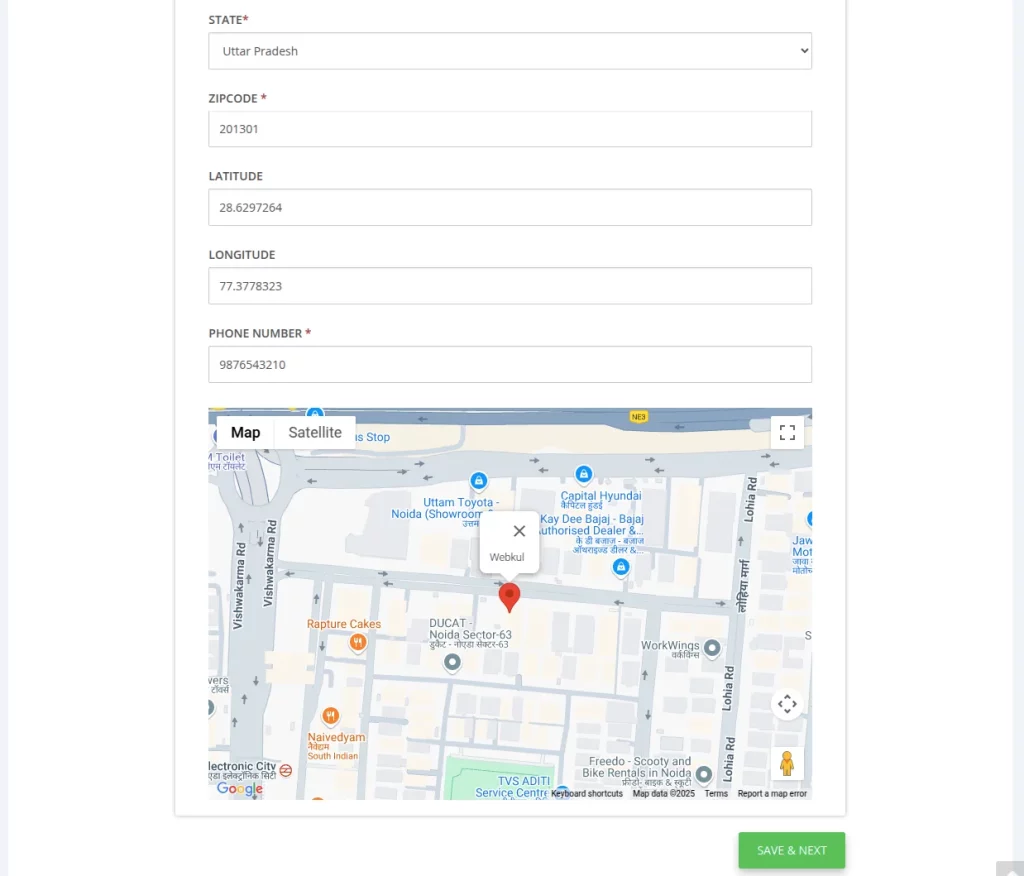
Step 2: Add Primary Business Location
Provide the primary location from which your business operates. Enter your complete business address.
The system will automatically populate details such as:
- City
- State
- Country
- Postal Code
Verify the information and click Save & Next.
Step 3: Complete KYC Verification
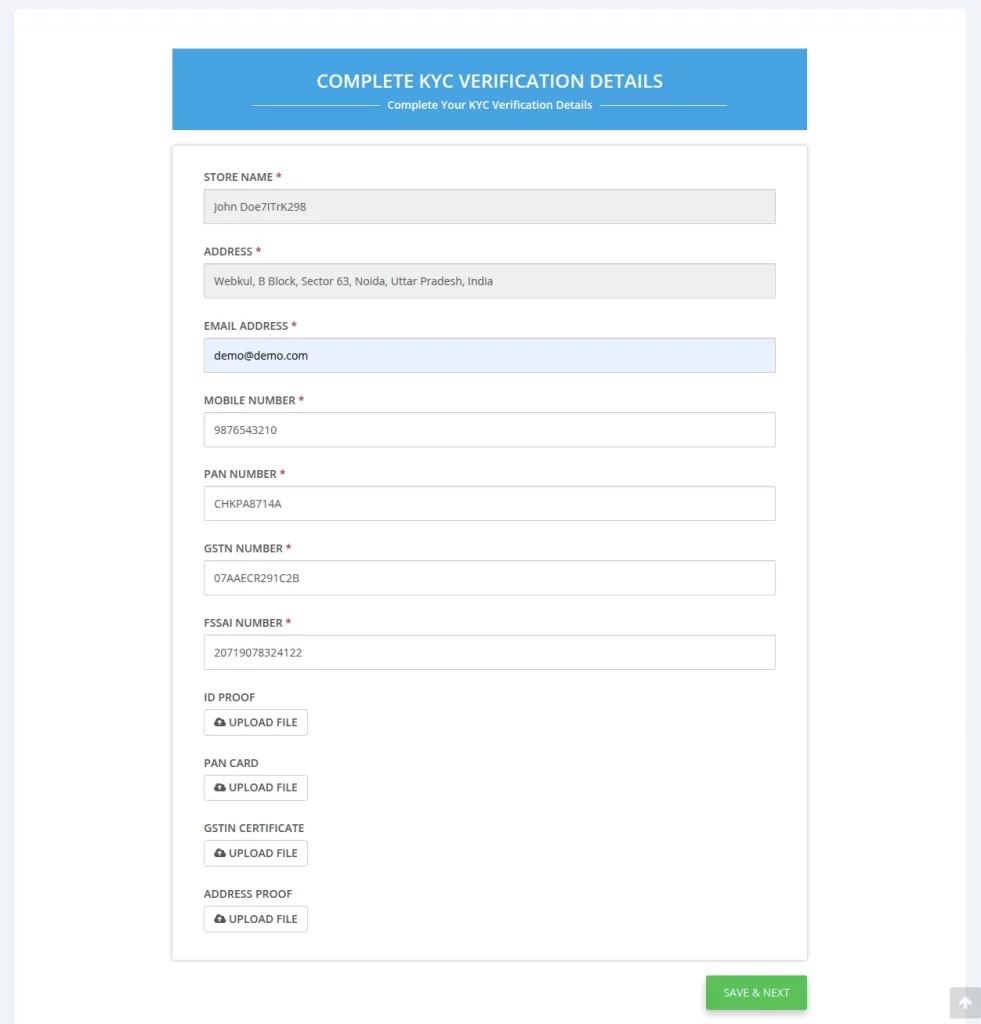
To comply with regulatory requirements and activate your seller account, complete the KYC verification process.
The following information will be pre-filled based on the details provided earlier:
- Store Name
- Business Address
- Mobile Number
Provide the required business identification details:
- PAN Number
- GSTIN
- FSSAI License Number (if applicable)
After entering the information, proceed to the next step.
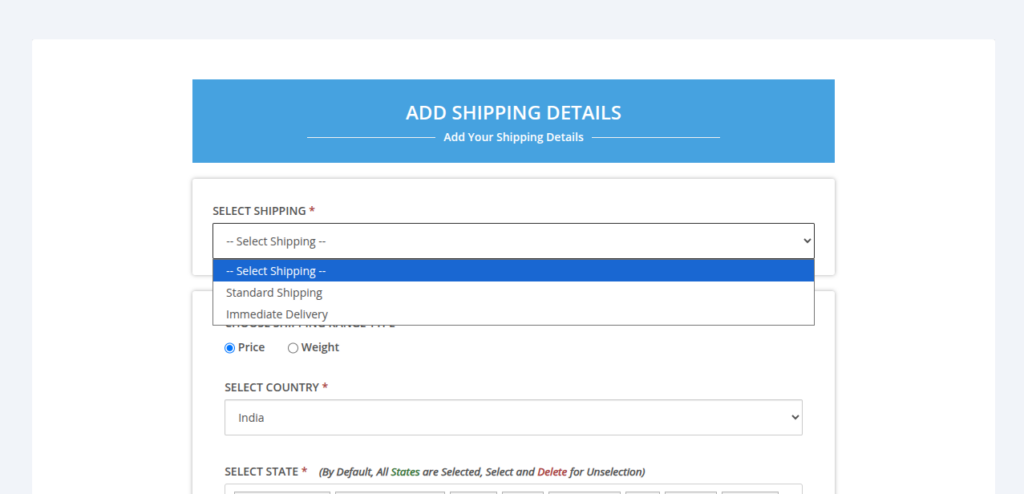
Step 4: Configure Shipping Details
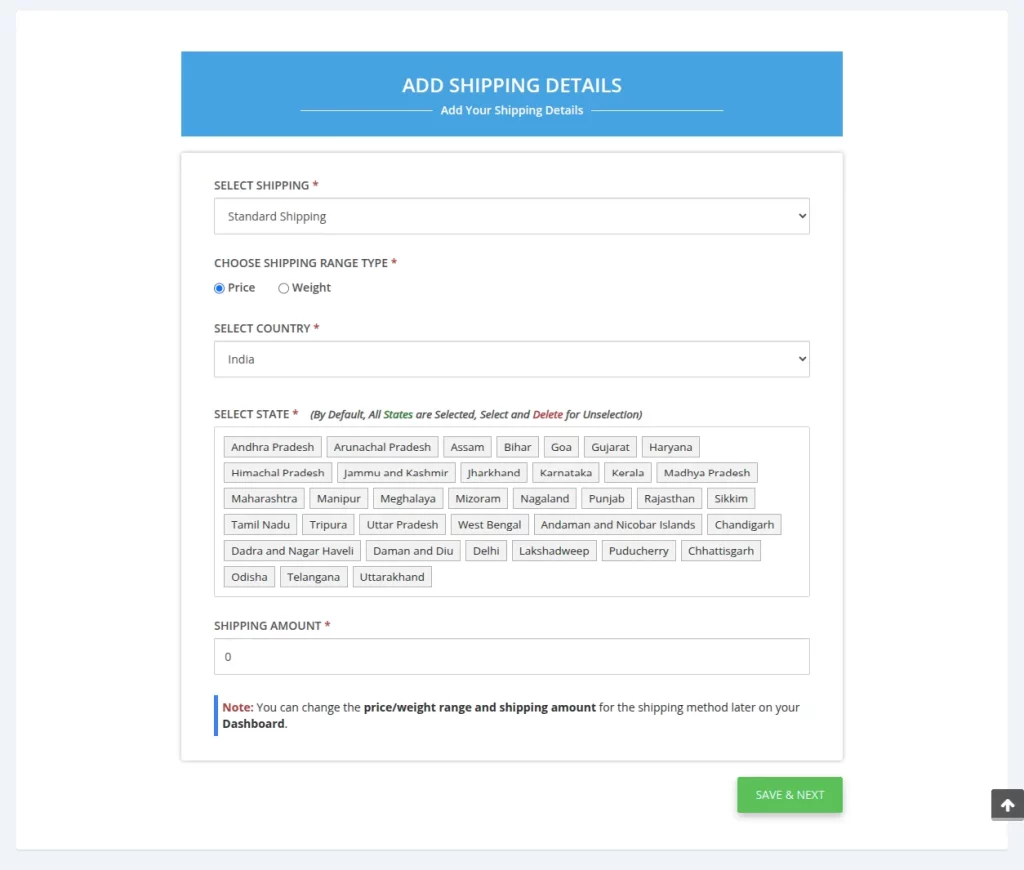
Set up the shipping methods and delivery regions for your store.
During this step, you can:
- Select the shipping method used for deliveries.
- Define shipping charges based on price or weight.
- Choose the countries and states where deliveries are available.
- Configure applicable shipping fees.
Shipping Options
- Standard Shipping : Recommended for deliveries completed within 1–2 business days.
- Immediate Delivery : Suitable for hyperlocal or rapid deliveries completed within a few hours.
Choose the option that aligns with your fulfillment capabilities.
Step 5: Add Payment Details
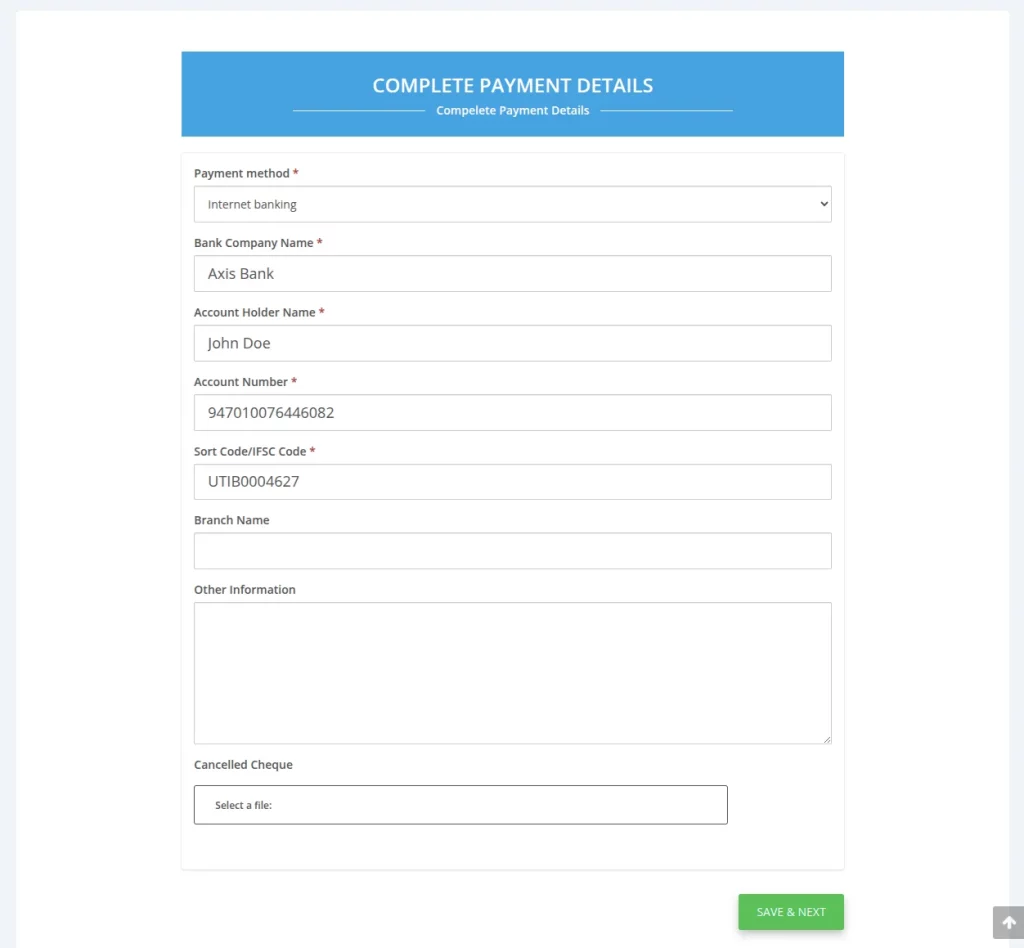
Configure the payment information required for receiving settlements and processing transactions. Ensure all payment details are accurate before proceeding.
Step 6: Configure Hyperlocal Delivery
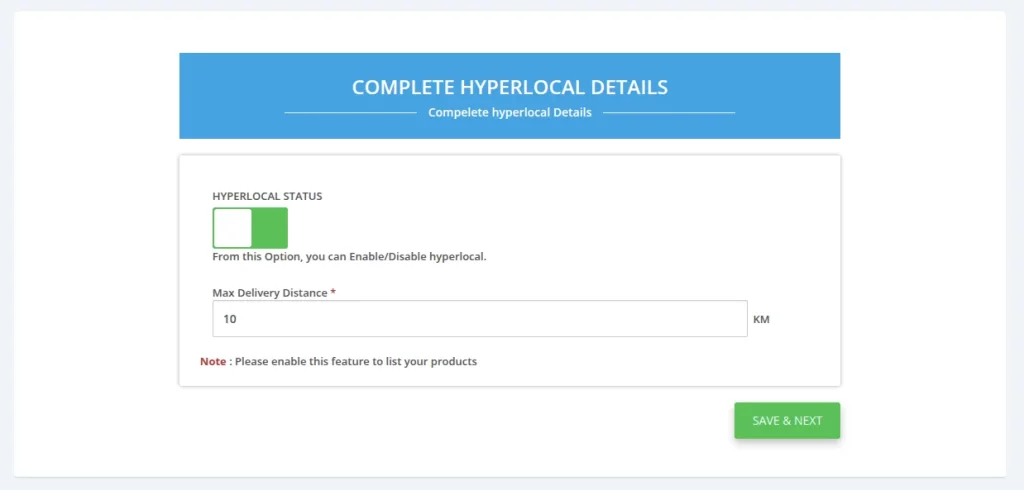
If your business offers local deliveries within a specific geographic radius, or if you deal in Food & Beverages, you can enable Hyperlocal Delivery.
When enabled:
- Specify the maximum delivery distance (for example, 10 km).
- Customers within the configured radius will be eligible for local delivery services.
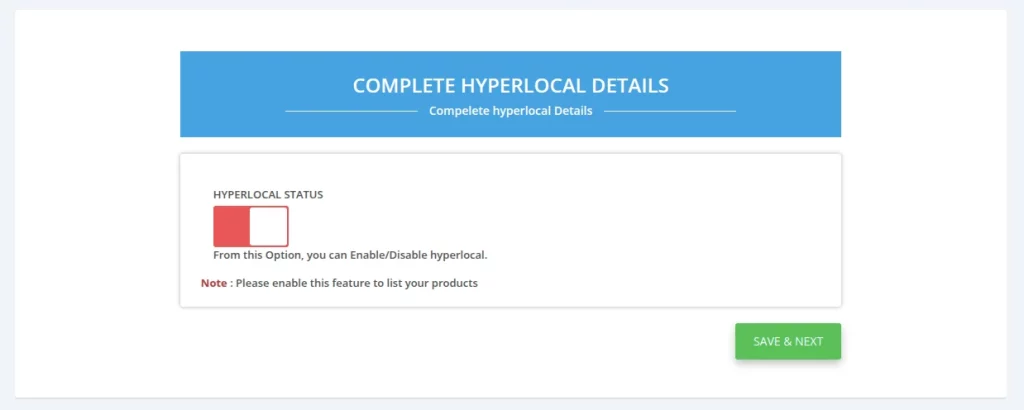
If your business delivers across larger regions or throughout India, Hyperlocal Delivery can remain disabled.
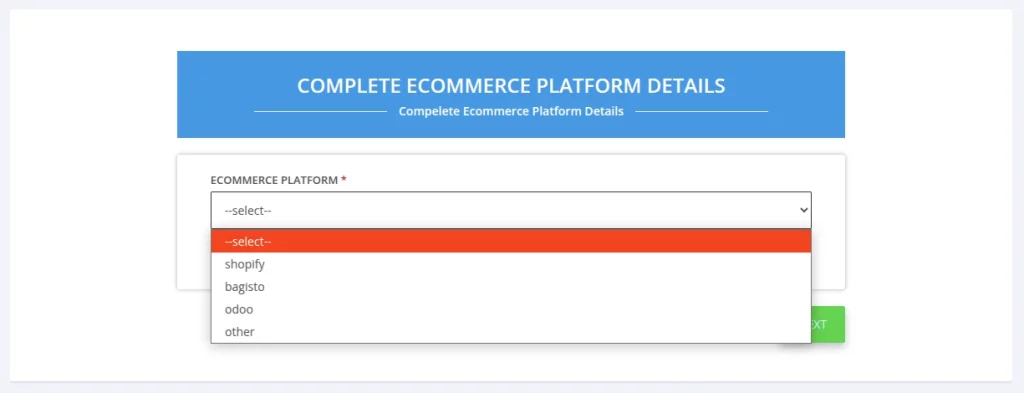
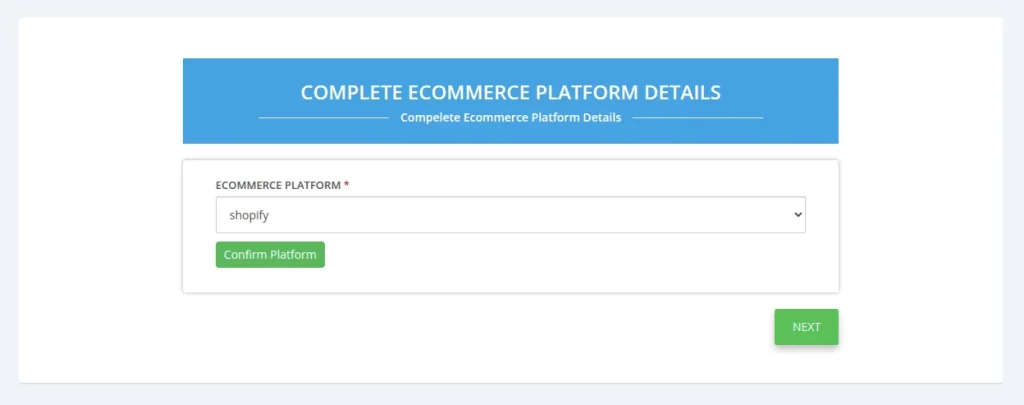
Step 7: Select Your E-commerce Platform
Choose the platform that currently powers your online business.
New Sellers
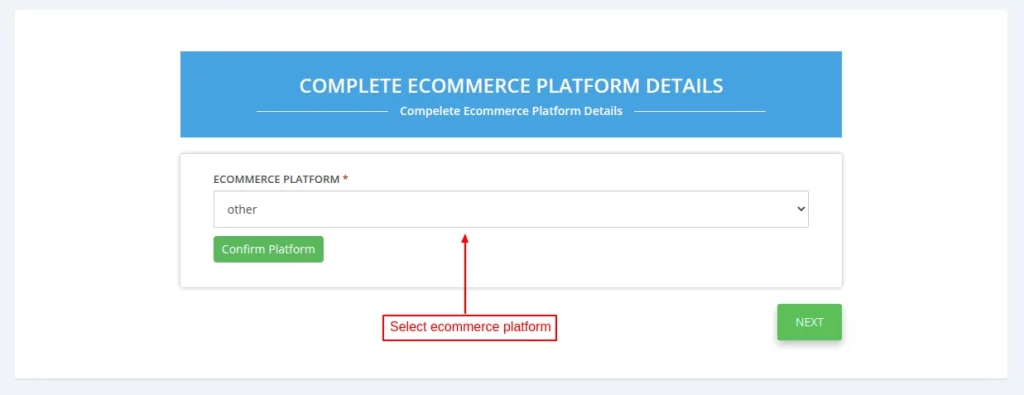
If you are not using any supported e-commerce platform:
- Select Other from the dropdown menu.
- Click Confirm Platform.
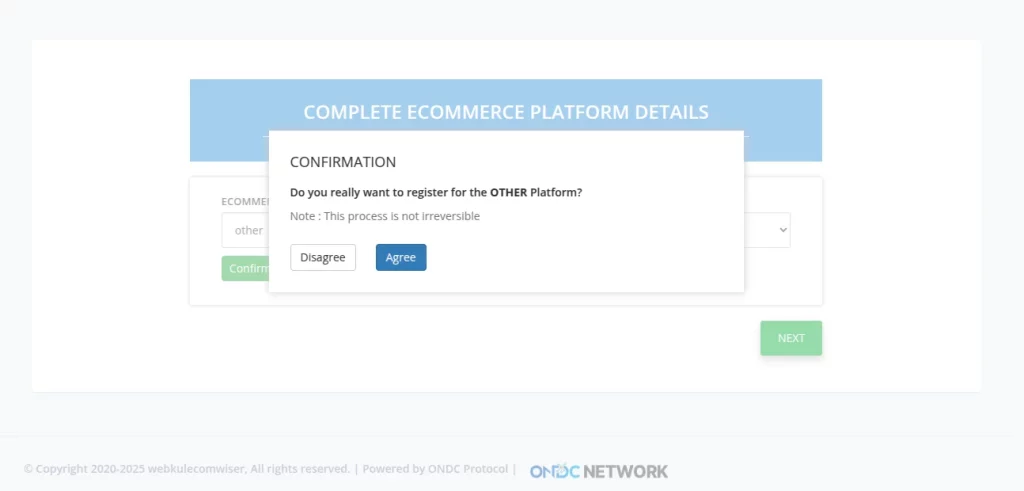
- Accept the confirmation prompt.
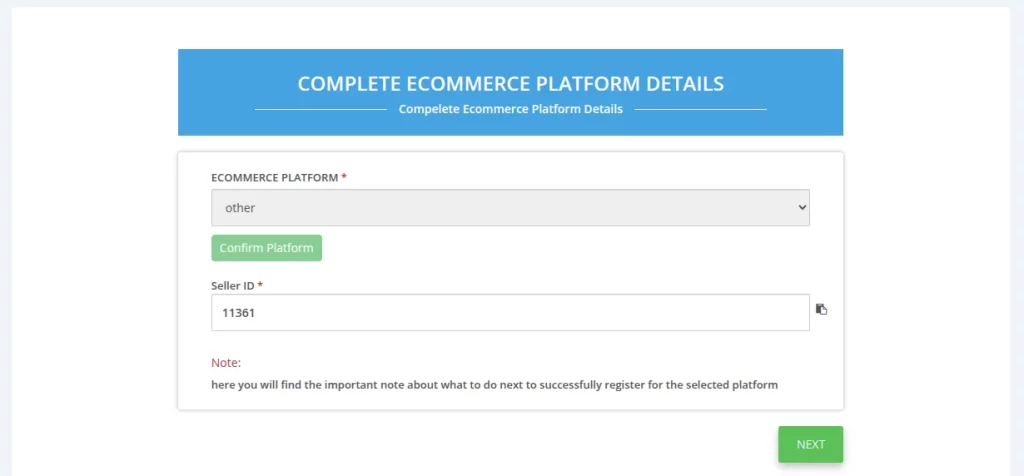
Once confirmed, a unique Seller ID will be generated for your account.
Existing Platform Users
If you are already selling through platforms such as Shopify, Bagisto, or Odoo:
- Continue with the onboarding process.
- Select the appropriate platform.
- Complete the required platform configuration steps.
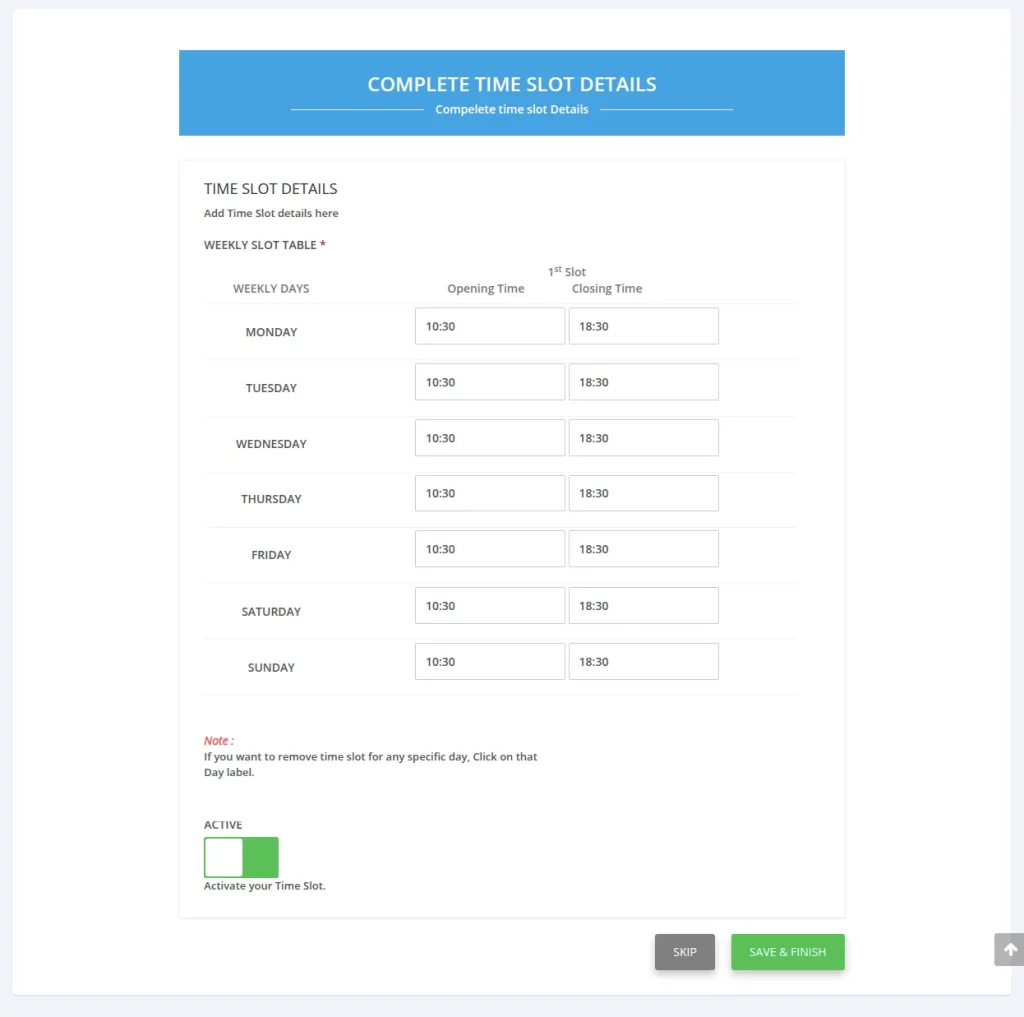
Step 8: Configure Business Hours
Define your store’s operating schedule by setting opening and closing hours. Accurate business hours help ensure proper order processing and customer communication.
After configuring your schedule, click Save & Finish.
Upon successful completion, you will be redirected to the Seller Dashboard.
Seller Dashboard Setup
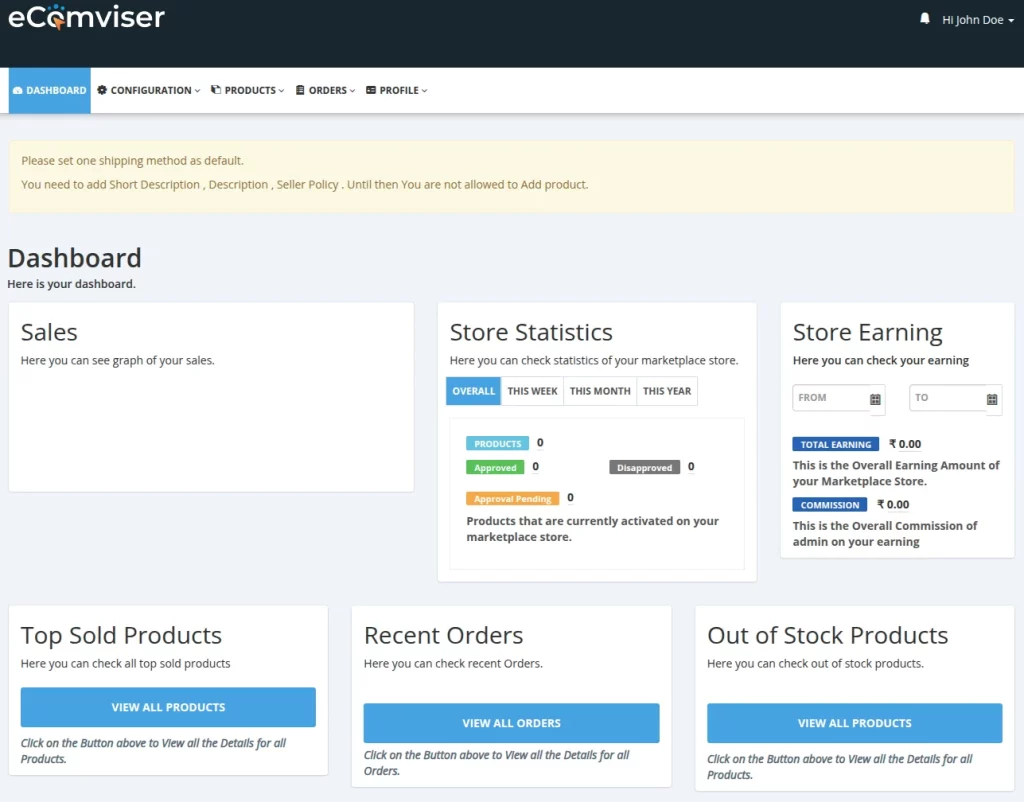
Before listing products, complete the following configuration steps.
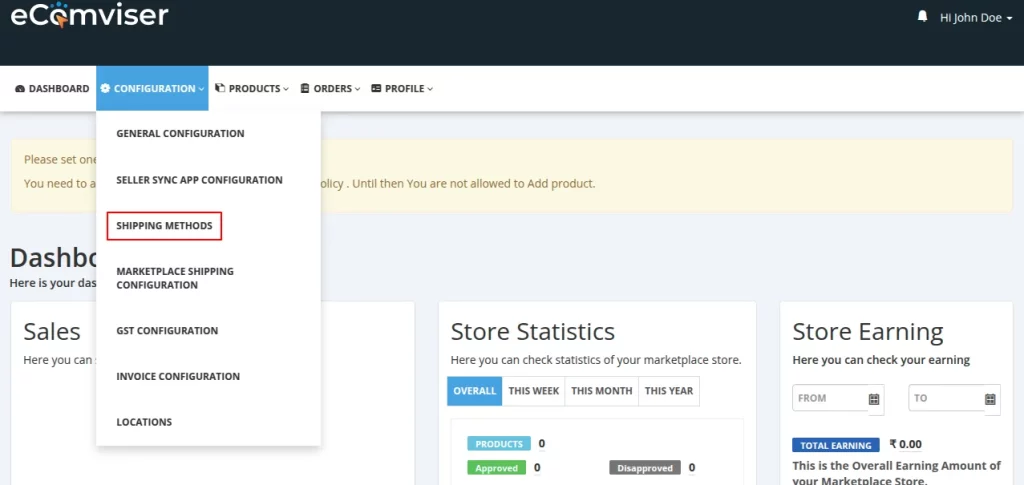
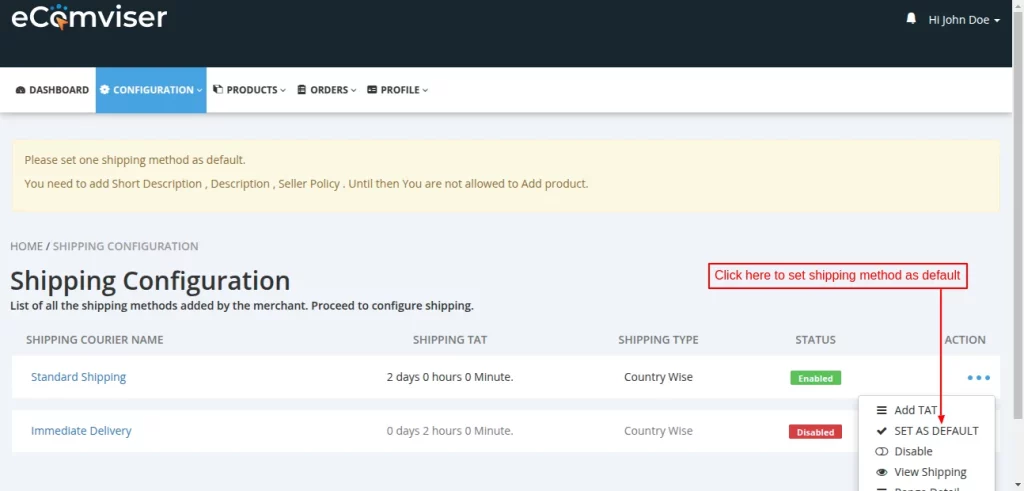
Set a Default Shipping Method
Navigate to: Configuration → Shipping Methods
Select one of your configured shipping methods and mark it as the default option for order fulfillment.
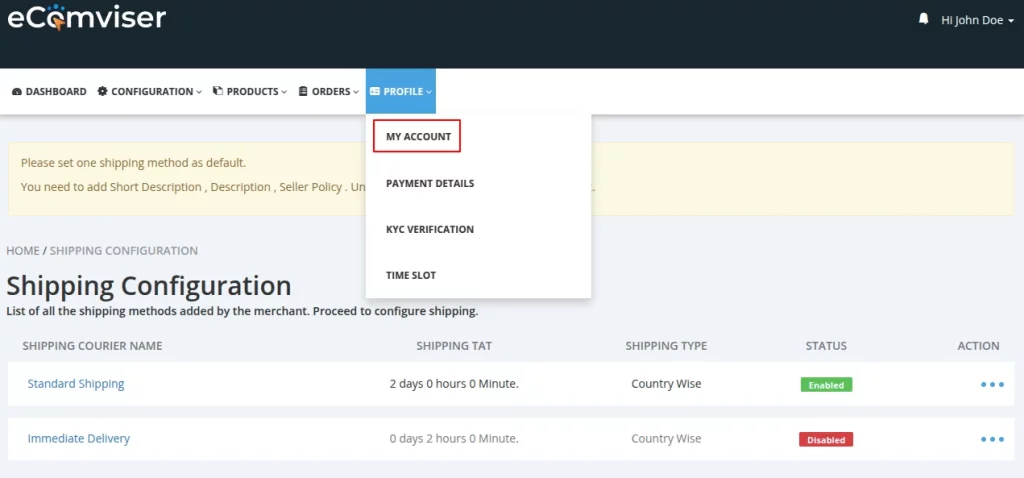
Complete Seller Profile Information
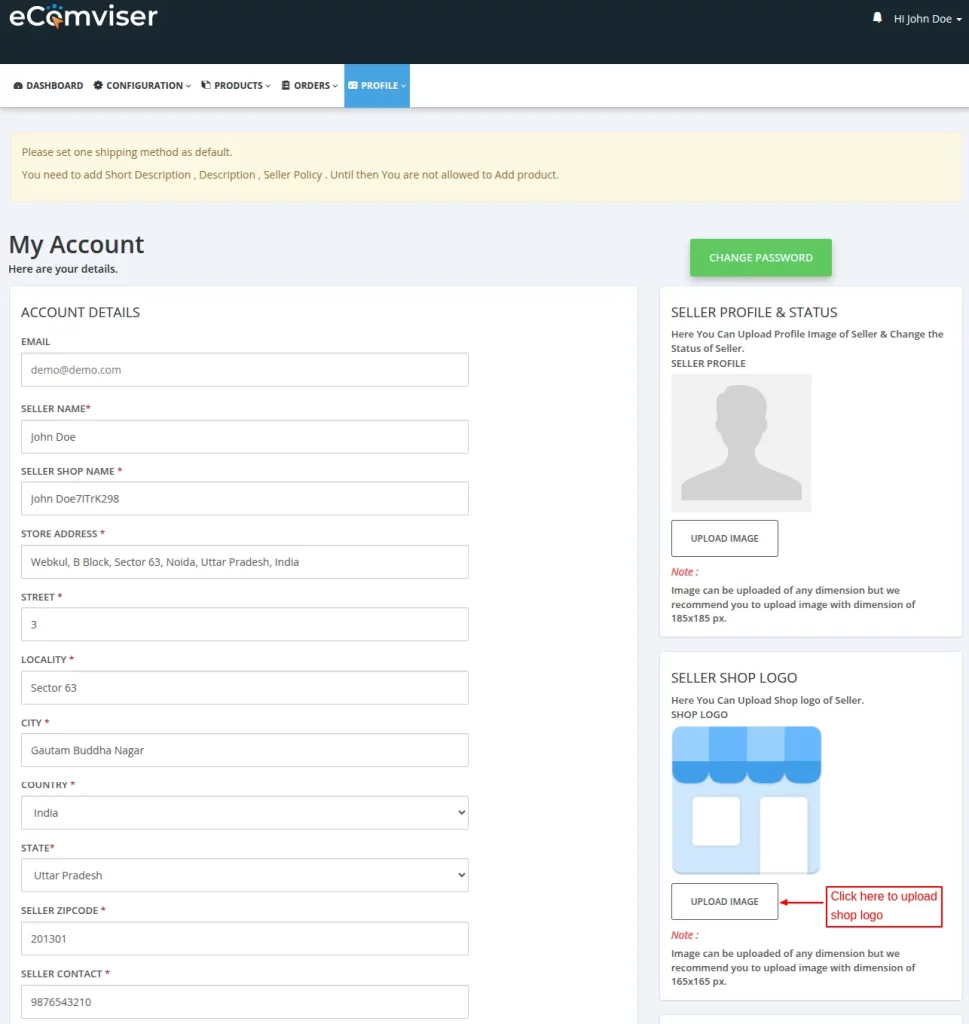
Navigate to: Profile → My Account
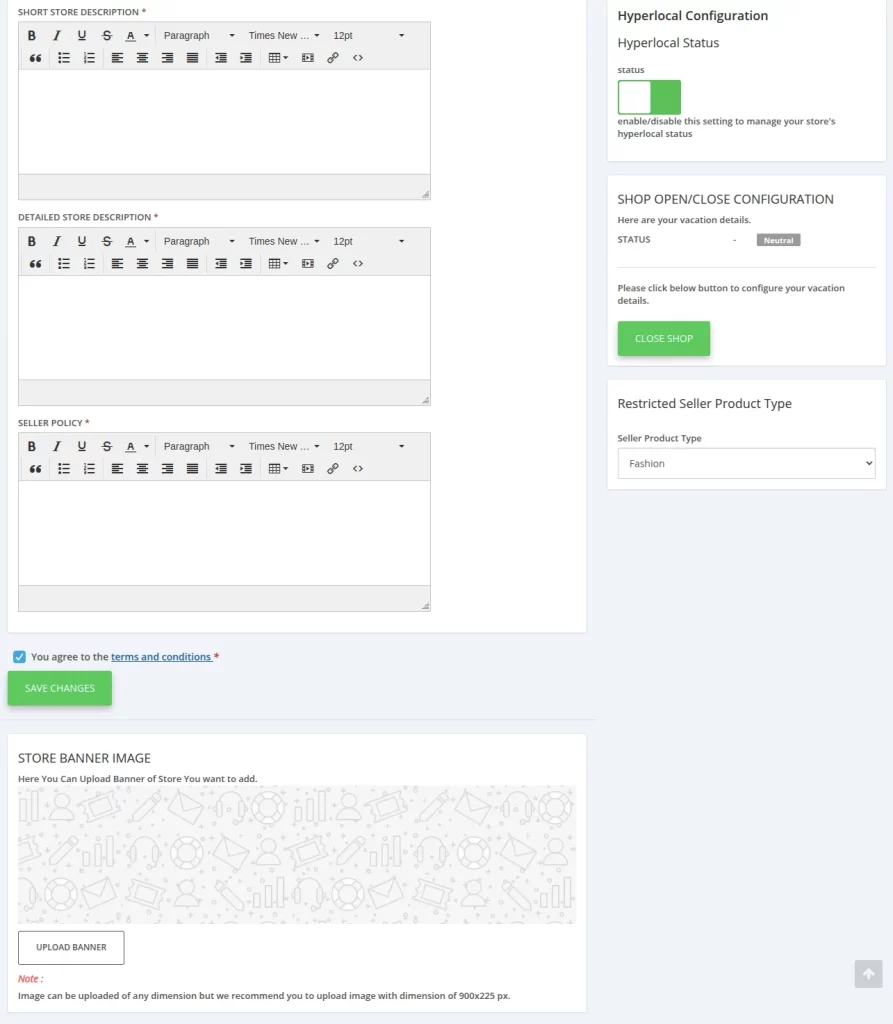
Provide the following information:
- Short Description
- Detailed Business Description
- Seller Policy
Completing your profile helps improve your store’s credibility and ensures customers have access to important business information.
Start Adding Products
Once your profile and shipping configuration are complete, you can begin listing products on the eComviser Seller App.
Your products will then become available across compatible ONDC buyer applications, enabling customers to discover and purchase them through the ONDC network.
Need Assistance?
Need technical support or have any questions regarding onboarding, configuration, or product listing?
Please contact the eComviser support team through our official support portal (http://webkul.uvdesk.com) or email us at [email protected].
Our team will be happy to assist you throughout your onboarding journey.


Be the first to comment.